Fronius Personal Display Tester Benutzerhandbuch
Seite 16
6
Testing the radio
connection for
the Fronius
Personal Display
DL Box
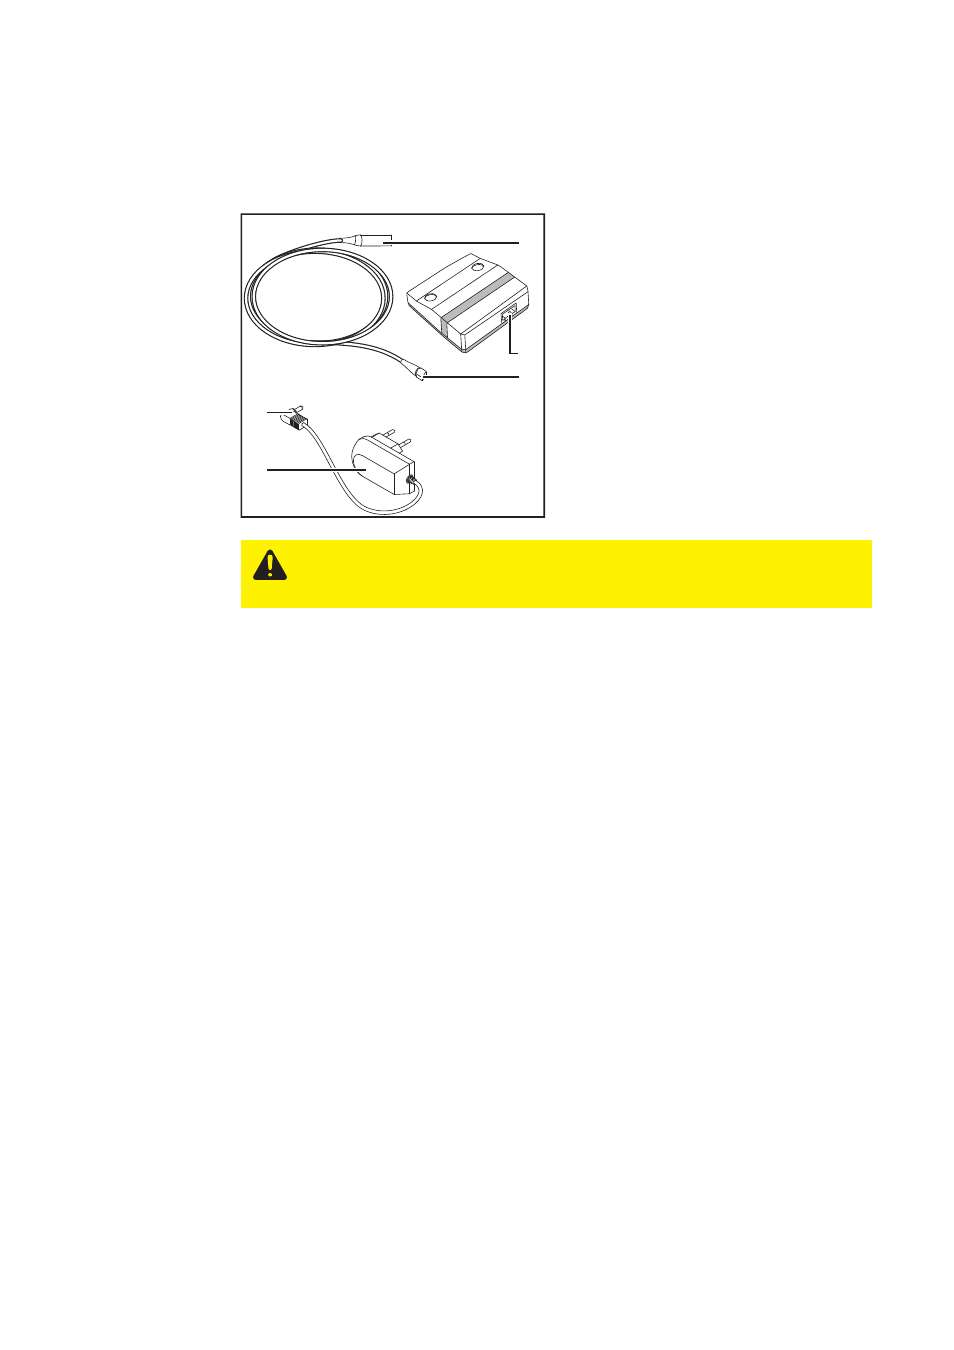
1.
Position the Personal Display DL Box
Dummy at the location where you
intend to put the Fronius Personal
Display DL Box
2.
Insert the RJ 45 plug of the power
supply adapter cable (1) into the RJ 45
socket of the Personal Display DL Box
Dummy (2)
(3)
(5)
(1)
(4)
(2)
Testing the radio connection for the Fronius Perso-
nal Display DL Box
CAUTION! An incorrect power supply to the device can cause serious injury and
damage. Only connect the device to the mains using the power supply included
in the scope of supply.
3.
Plug the female connector of the supplied power supply (3) into the socket (4) of the
power supply adapter cable
4.
Plug the supplied power supply (5) into the socket
5.
Position the Fronius Personal Display DL at the intended installation location and
add the Personal Display DL Box Dummy to the Fronius Personal Display DL as an
inverter.
Power values are simulated and sent to the Fronius Personal Display DL. These are
updated every 10 seconds.
Important! If the device is disconnected from the mains or the Fronius Personal Display
DL is reset, the device must be added as an inverter to the Fronius Personal Display DL
again.
Refer to the Fronius Personal Display DL operating instructions for more information about
adding devices to the Fronius Personal Display DL.
Check RF can also be used to check the radio connection - refer to the operating instruc-
tions for the relevant Fronius Personal Display DL.