Setting the unattended auto-lock clock – iStorage 1TB diskAshur PRO2 USB 3.1 Encrypted Portable HDD Benutzerhandbuch
Seite 12
#12
iStorage diskAshur PRO
2
®
Manual – v 3.0
www.istorage-uk.com
15. How to Create an Admin PIN after a Brute Force attack or Reset
It will be necessary after a Brute Force attack or when the diskAshur PRO
2
has been reset to create an Admin PIN before the
drive can be used. If the drive has been brute forced or reset, the drive will be in a standby state (solid
RED
LED). to create an
Admin PIN proceed with the following steps.
PIN requirements:
• Must be between 7-15 digits in length
• Must not contain only repetitive numbers, e.g. (3-3-3-3-3-3-3)
• Must not contain only consecutive numbers, e.g. (1-2-3-4-5-6-7), (7-8-9-0-1-2-3-4), (7-6-5-4-3-2-1)
16. Setting the Unattended Auto-Lock Clock
To protect against unauthorised access if the drive is unlocked and unattended, the diskAshur PRO
2
can be set to
automatically lock after a pre-set amount of time. In its default state, the diskAshur PRO
2
Unattended Auto Lock feature is
turned off. The Unattended Auto Lock can be set to activate between 5 - 99 minutes.
To set the Unattended Auto Lock, first enter the “
Admin Mode
” as described in section 5. Once the drive is in
Admin
Mode
(solid
BLUE
LED) proceed with the following steps.
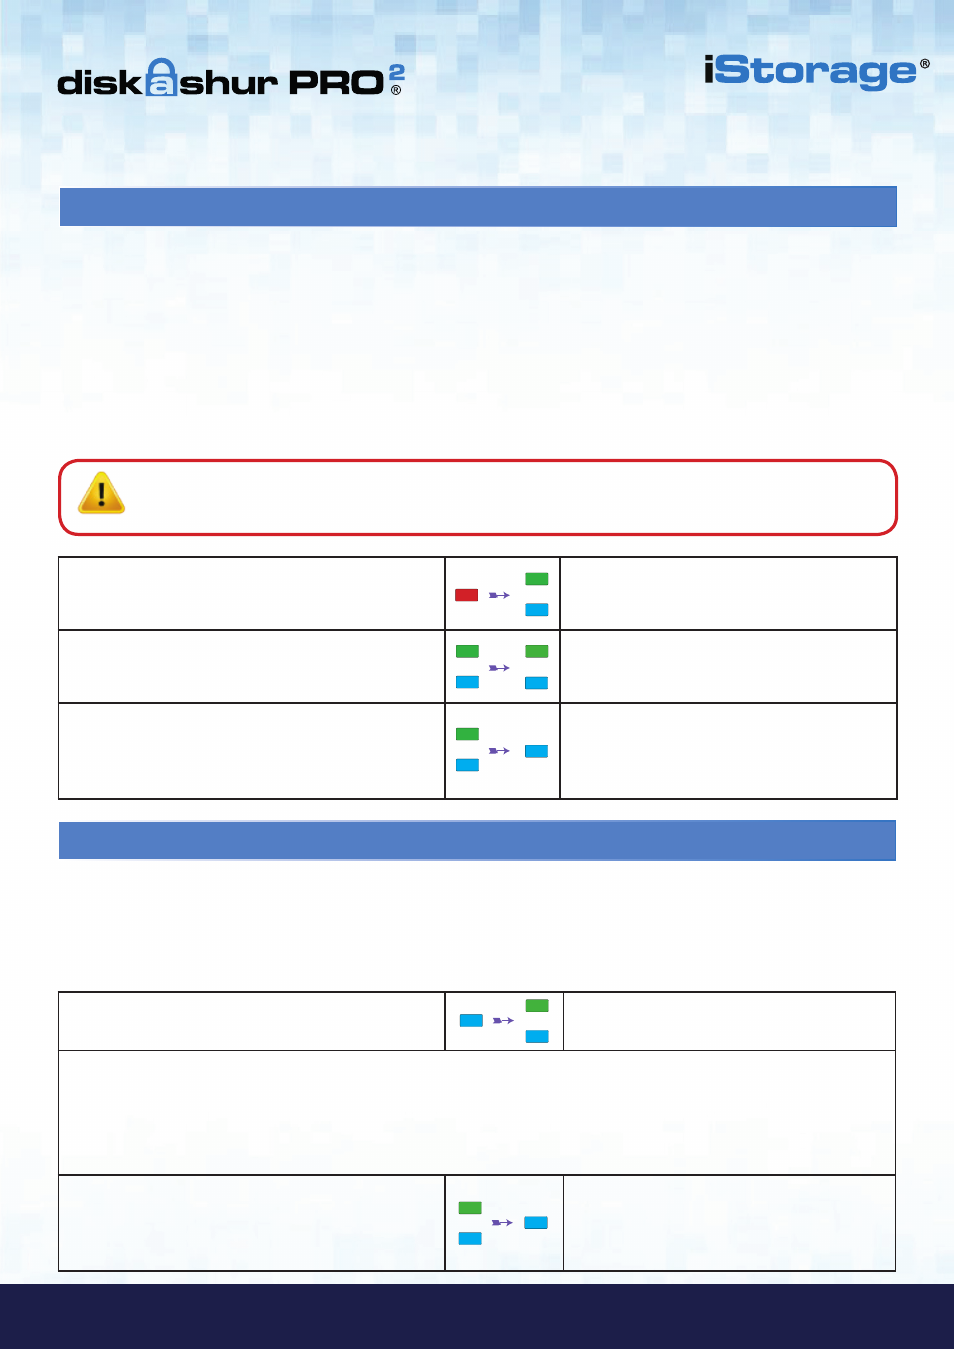
1. In Admin mode, press and hold down
“
UNLOCK + 5
” buttons
Solid
BLUE
LED will change to blinking
GREEN
and
BLUE
LEDs
2. Enter the amount of time that you would like to set the Auto-Lock timeout feature for, the minimum time that can be set is
5 minutes and the maximum being 99 minutes (5-99 minutes). For example enter:
05 for 5 minutes
20 for 20 minutes
99 for 99 minutes
3. Press the “
SHIFT
” button
Blinking
GREEN
and
BLUE
LEDs will change to
a solid
GREEN
for a second and then finally to a
solid
BLUE
LED indicating the Auto-Lock time
out is successfully configured
1. In Standby state, press and hold down
“
Shift + 1
” buttons
Solid
RED
LED will change to blinking
GREEN
and solid
BLUE
LEDs
2. Enter NEW Admin PIN and press “
UNLOCK
” button
Blinking
GREEN
and solid
BLUE
LEDs will
switch to a single
GREEN
LED blink and then
back to blinking
GREEN
and solid
BLUE
LEDs
3. Re-enter the NEW Admin PIN and press “
UNLOCK
”
button
Blinking
GREEN
LED and solid
BLUE
LED
change to
BLUE
LED rapidly blinking for a few
seconds and then to a solid
BLUE
LED indicat-
ing the Admin PIN was successfully configured.
Note
:
The
SHIFT
key can be used for additional combinations.
SHIFT
+ 1 is a separate value than just 1.
To create a PIN using additional combinations, press and hold down the
SHIFT
button whilst entering
your 7-15 digit PIN. e.g.
SHIFT
+
26756498
.