Fronius DC-Freischaltbox 40/60 Benutzerhandbuch
Seite 34
12
(+)
(+)
(+)
(-)
(-)
(-)
3.
2.
2.
2.
2.
2.
2.
3.
3.
4.
4.
4.
(+)
(+)
(+)
(-)
(-)
(-)
5.
5.
5.
6.
6.
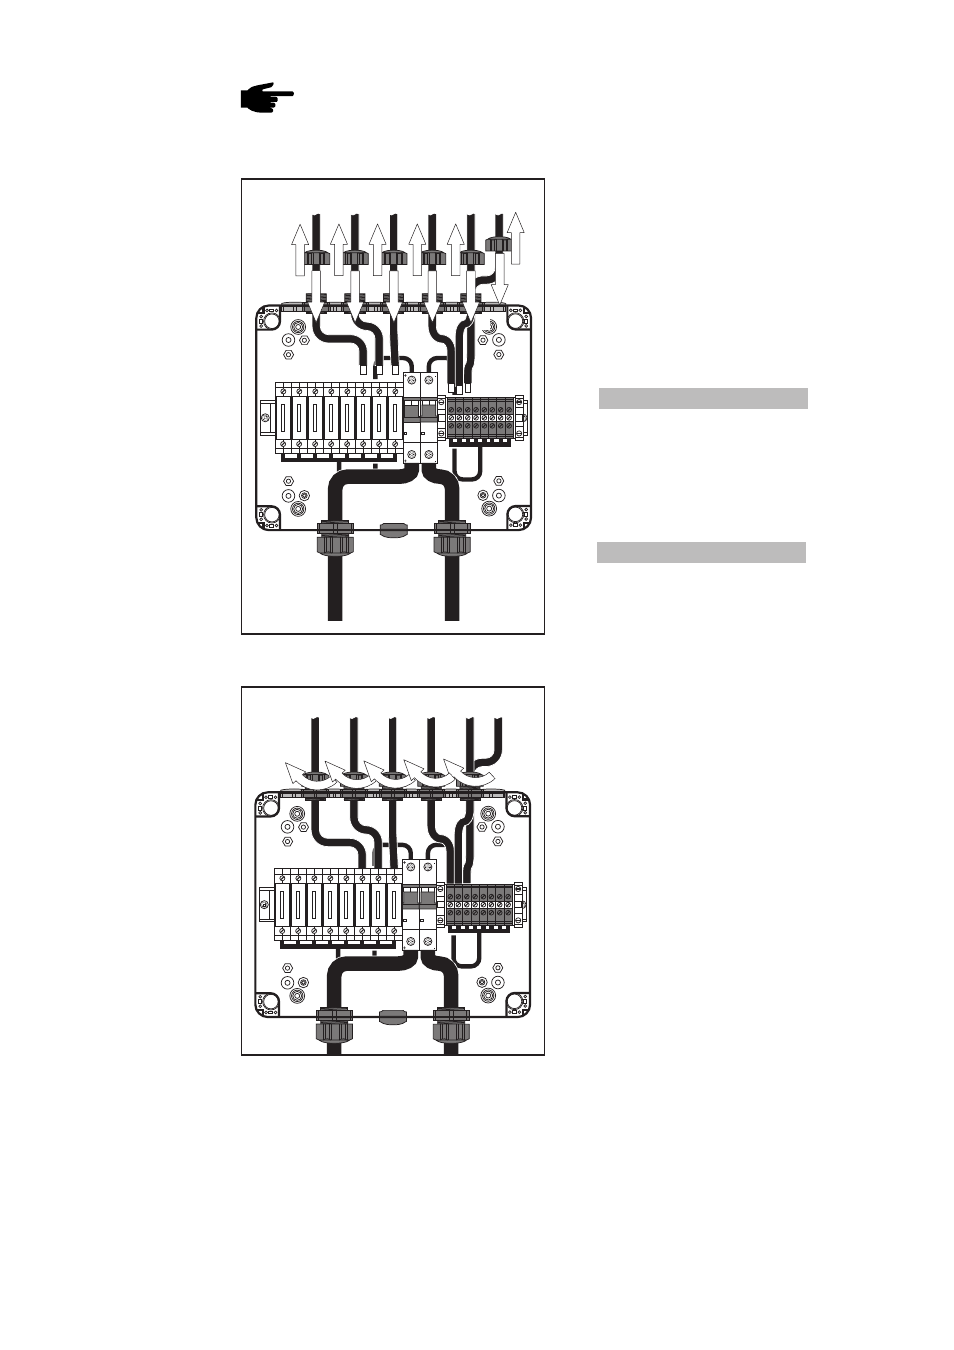
Connecting up
strings of solar
modules to the
DC isolating box
40/60
(continued)
NOTE! When connecting up more than two strings:
-
First introduce, connect and fix (with strain-relief devices) the strings
nearest the wall;
-
then introduce, connect and fix the outside strings.
2.
Slip strain relief devices over the
DC(+) and DC(-) string-cables of the
solar modules
3.
With the circuits opened, pass all the
DC(+) string-cables of the solar
modules through a separate “M16
solar-module side” screwed conduit
for each cable, and connect the
cables to the DC(+) string
connections in the DC isolating box
40/60
Tightening torque = 0.8 Nm
4.
With the circuits opened, pass all the
DC(-) string-cables of the solar
modules through a separate “M16
solar-module side” screwed conduit
for each cable, and connect the
cables to the DC(-) string connections
in the DC isolating box 40/60
Tightening torque = 0.8 Nm
5.
Fix the DC(+) string-cables of the
solar modules to the DC isolating box
40/60, using strain relief devices
6.
Fix the DC(-) string-cables of the solar
modules to the DC isolating box 40/
60, using strain relief devices
7.
Close the circuits of the solar modules
Fig.14 Connecting up the solar module string-
cables
Fig.15 Fixing the solar module string-cables to the
DC isolating box 40/60 using strain relief
devices
1.
After finishing all the connecting-up work, tie all the DC(+) string-cables together
with cable ties
2.
Tie all the DC(-) string-cables together with cable ties
3.
Check whether the DC voltage on the DC isolator is < 530 V
4.
Check the polarity on the main inverter leads
Finishing the job